a31 December 2012

20k pageviews and last post this year


Yesterday my blog reached yet another milestone - 20.000 pageviews in a single month! For me it's a great achievement because at the beginning of this year my blog had only around 200 - 300 pageviews monthly so now it's 100 times more. I hope to have 200.000 pageviews per month at the end of next year :) that would be nice (but would be hard to achieve as well but I hope you will help ;) )

You can view my summary of this year in pictures here (in form of free eBook) and also view my top 5 photos taken in 2012.

As this is also my last post in 2012 I would like to wish you all a Happy New Year full of positive surprises and events. I also hope to view great photos from you in the coming year.

And finally a few words about the photo from this post. It shows surroundings of La Casa de los Coroneles (House of the Colonels) in the town of La Oliva on Fuerteventura. I used only 3 exposures at 2 EV spacing but they covered dynamic range of the scene pretty well.

Continue reading for more details »

a30 December 2012

Tutorial: MagicLantern + Lightroom + Photomatix + Topaz = Perfect HDR Workflow

I prefer not to repost images but end of year is a great occasion to look back. I took this image in 2011 in Rome and it's still amongst my favourite photos.
Back in April 2012 I posted details on my HDR workflow. However, I always try to make my workflow better and more effective. My seek to improve it resulted in quite a lot of changes in recent weeks and months, mainly addition of two new tools: MagicLantern and Topaz filters which now became essential to me. So below you will find details on my updated workflow:

  1. I normally start by using MagicLantern. It's a tool that greatly extends capabilities of Canon DSLRs. You can read more about its advantages here. Most of the time I use its HDR bracketing feature to set 5 to 9 brackets. Great thing is that I can do this even when shooting hand-held (Photomatix doesn't usually have problems with aligning the images). When I work with shallow depth of field I also use its other feature: Focus Stacking.
  2. Then I head to Lightroom where I organize my photos and apply some preliminary processing.
    1. Regarding organizing my photos I first go through whole folder and mark best photos as picks and worst as rejected. Then I go through it another time, repeating this process, and probably once more. After that I go through my folder and group similarly looking images into Stacks. I usually process only 1 photo (or bracketed sequence) from each Stack and reject the rest. This results in about 90 - 95% of all photos being rejected.
    2. Concerning processing. Most of the time this is limited to setting correct white balance (I use Cloudy or Shadow for sunsets and sunrises), applying lens correction and reducing chromatic aberrations. In case of photos taken with high ISO I can also apply noise reduction at this stage. I often apply some small sharpening here but this isn't a recommended practice :)
  3. Open images in Photomatix Pro using a Lightroom plugin (which comes for free with your Photomatix Pro copy) making sure the Auto Re-Import option is checked. In Photomatix Pro my target is to restore as many details in highlights and shadows as possible. At this stage I don't care about colour temperature or saturation. Therefore, what I do most of the time recently is to use Default preset in Photomatix Pro 4.2.5. You might find it boring, colorless etc. Yes, it's quite boring compared to some other presets (especially Grunge or Creative) but it has strong advantage of restoring details perfectly. You can read more about my reasons here. I do make a few minor changes to it (looking at the histogram all the time to make sure neither highlights nor shadows get clipped):
    1. I lower White Point setting value to much closer to 0 (look at the histogram when doing this because what you should achieve is avoiding highlights clipping) to make sure highlights aren't getting clipped
    2. I also increase Detail Contrast (often all the way to 10.0) to enhance details as this setting increases local contrast.
    3. I also adjust Lighting Adjustments to get as realistic results as possible (mainly to get rid of any halo arifacts). I use different values depending on a photo so I'm not giving any good or bad values here.
    4. Sometimes I may also adjust Luminosity or Gamma.
  4. I save the image as 16-bit TIFF. Saving to 8-bit TIFF or JPEG has the effect of reducing quality and the colour gradients aren't that smooth anymore.
  5. As I use Auto Re-Import feature when exporting from Lightroom to Photomatix I can now go back to Lightroom and my tone-mapped image will be right there. There I adjust settings like:
    1. Vibrance (I often decide to reduce it to to the value between -5 to -20),
    2. Clarity (I often increase it to a value between 15 and 50),
    3. Contrast (just a little bit at this stage),
    4. Highlights and Shadows (to restore them).
    5. If necessary I also correct colour balance at this step (especially greens as I have some problems capturing them properly or when I want warmer look for sunrises or sunsets). I often use presets at this step to make my work faster.
  6. Export image to Photoshop... and now the real fun begins :) Yeah, I'm a great fan of Photoshop. I prefer to edit my photos in it and not in Lightroom. However, my editing in Photoshop is also quite simple... and yes I do use presets (Actions in this case) to make it even simpler :) :
    1. I start with denoising my image using Topaz Denoise 5. I generally start by selecting a preset which removes all the noise and then select preset which is by a step weaker and make adjustments to it. Sometimes I apply different denoising to different parts of the image.
    2. After that I usually add some details using Topaz Detail 3 (new version really rocks!). This adds some clarity and visual sharpness to the image.
    3. Next step is to play with colours. I use three tools for it:
      1. Topaz Adjust - I use Topaz Adjust to make colours warmer and also to add some clarity and vibrance to the image.
      2. Colour balance adjustment layer - I might use this tool when I want to give specific look to the image, eg. to make it more purple for sunrises. I usually make only subtle changes with it but enough to make the image nicer.
      3. Hue/Saturation adjustment layer - I use it when some colours (eg. greens or blues) are oversaturated. I then reduce their saturation to make them look more naturally.
    4. After that I might add a bit of contrast using Curves adjustment layer. Most of the time I use Linear Contrast preset.
    5. Finally I apply sharpening. Most of the time I do it using Smart Sharpen or Unsharp Mask. However, recently I started to sharpen with High-pass filter and I'm pretty satisfied with the results. As I often do have sky in my photos I often sharpen selectively. Sometimes I create Layer Mask and paint on it manually with a very soft brush. Often, however, I generate it automatically by finding edges in the image and applying sharpening only to them.
  7. Finally I save my image as a JPEG with a maximum quality.

Continue reading for more details »

a29 December 2012

On the walls

I took this photo in February 2012 in Sintra, Portugal and it shows ruins of the Moorish Castle. I regret taking only 3 exposures but unfortunately there was no way of taking more. I needed to shoot hand-held because there was no place on the walls of this enormous castle to set up tripod.

EXIF data:
Camera: Canon 5D MK II
Lens: Canon 24-105 f/4 L IS USM
Focal length: 24 mm
Aperture: f/9.0
Exposure time: 1/320 s ("middle" exposure)
ISO: 640
Number of exposures: 3
E.V. Step: 2 E.V.
Flash used: no
Tripod used: no
Filters used: no
Software: Photomatix Pro 4.2.5, Magic Lantern, Lightroom 4.2, Photoshop CS5

Continue reading for more details »

a28 December 2012

Tutorial: creating star bursts in camera

You have probably seen a number of photos with all light sources looking like tiny stars (also referred to as star bursts). If you haven't, take a look at the photo above to see what I mean. All point lights look like stars. This effect is especially effective in the night photos taken in the city as it makes such photos much more interesting.

You can create such an effect easily in post-processing but in fact it's possible and very simple to create it in camera as well (and frankly speaking I prefer achieving it this way). You just need to do following:
  1. Shoot with a wide-angle lens (eg. 16 or 24 mm),
  2. Make sure you use slow aperture (like f/13 or f/16 - the latter works best for me) because otherwise the effect won't be clearly visible (with very fast apertures it won't be visible at all),
  3. Make sure the light source doesn't fill whole frame or most of it (as the effect won't be visible in such a case), i.e. all light sources should be at some distance from the lens.
  4. Note: the number of stars' arms is very easy to predict. Each lens has a number of aperture blades (look in the specs). This number equals to the number of stars' arm this lens would produce. Canon 24-105 L has 8 aperture blades and that's why all "stars" in the image above have 8 arms.
Hope this helps :)

Continue reading for more details »

a27 December 2012

My Top 5 this year

With year 2012 getting to an end I decided to make a small summary of it. It was a very nice year for me concerning photography. I greatly improved my skills (both as a photographer and retoucher), I became Shutterstock contributor, some of my photos were exhibited and also a few were used in a magazine. That's all great and I hope the next year will bring even more interesting things. But the most important thing is I took a few shots that I think are of high quality.

Below you fill find summary of my best photos taken this year. It's a very personal choice. Interesting thing is that only 2 out of 5 photos below are HDR photos. It shows that this year I tried a lot of different techniques and types of photography.

#5 Photo of a family in Dahab, Egypt.

#4 Photo of the jaguar from Warsaw Zoo.

#3 The Hieronymites Monastery in Lisbon

#2 Two roads, Milky Way over Fuerteventura Island

And the winner is...
#1 Buying books, Warsaw photo I took very recently became my personal favourite this year. I love everything about it - from composition to colors and mood it creates.

Continue reading for more details »

a26 December 2012

Christmas Tree

Christmas are almost over but the Christmas atmosphere is still there.

EXIF data:
Camera: Canon 5D MK II
Lens: Canon 24-105 f/4 L IS USM
Focal length: 24 mm
Aperture: f/14.0
Exposure time: 1.0 s ("middle" exposure)
ISO: 400
Number of exposures: 7
E.V. Step: 1 E.V.
Flash used: no
Tripod used: yes
Filters used: no
Software: Photomatix Pro 4.2.5, Magic Lantern, Lightroom 4.1, Photoshop CS5

Continue reading for more details »

a25 December 2012

Colorful lights

Warsaw Old Town looks beautifully now with a lot of colourful lights and beautiful reflections in the wet pavement. Here is another photo from there.

As you probably know I'm a great fan of Photomatix Pro's Details Enhancer algorithm. However, recently I started to use Fusion/Natural it offers quite a lot. For instance I used it to process the image above. Why? It produces very natural looking images and noise isn't a amplified. For these reasons I will probably update my HDR tutorial soon to describe Exposure Fusion as well.

EXIF data:
Camera: Canon 5D MK II
Lens: Canon 24-105 f/4 L IS USM
Focal length: 24 mm
Aperture: f/16.0
Exposure time: 2.5 s ("middle" exposure)
ISO: 320
Number of exposures: 7
E.V. Step: 1 E.V.
Flash used: no
Tripod used: yes
Filters used: no
Software: Photomatix Pro 4.2.5, Magic Lantern, Lightroom 4.1, Photoshop CS5

Continue reading for more details »

a24 December 2012

Glowing lamps

Another Christmas themed photo from Warsaw.

Also make sure to view my free eBook full of travel photos from 2012.

EXIF data:
Camera: Canon 5D MK II
Lens: Canon 24-105 f/4 L IS USM
Focal length: 24 mm
Aperture: f/13.0
Exposure time: 2.5 s ("middle" exposure)
ISO: 200
Number of exposures: 7
E.V. Step: 1 E.V.
Flash used: no
Tripod used: yes
Filters used: no
Software: Photomatix Pro 4.2.5, Magic Lantern, Lightroom 4.1, Photoshop CS5

Continue reading for more details »

a23 December 2012

Merry Christmas

This will be a very short post - I would like to wish you a Merry Christmas everyone!

Continue reading for more details »

a22 December 2012

Mountains and 2 years with Photomatix

I remember taking my first quite nice HDR images about 2.5 years ago. I started using Photomatix by that time (I used trial earlier for some time earlier but I didn't understand HDR by the time so the results were rather poor). Later that very year (2010) I checked HDRsoft web page to see if there were any updates. There weren't updates to the software but I found out HDRsoft was recruiting. As a programmer with a few years of experience by that time, although mainly in the gaming and similar industries, I gave it a shot and... ever since I am a member of Photomatix team :) believe me or not - it's a great experience. Working on an application you use on a daily basis and many (and I mean MANY) of your friends do use it as well is huge. It keeps one motivated and satisfied. I might take poor photos (but I hope it's not that bad) but as long as people are happy with Photomatix, so am I :)

Now a few words on a photo from this post. I took it during golden hour and it shows Lanzarote island. I didn't hope for anything nice when taking it as not only I was shooting it hand-helding my camera but also I was shooting it from a quickly moving ship (not to mention small jumps on the waves). I expected blurry, completely misaligned results together with horizon being completely off but luckily it wasn't that bad :) maybe I have image stabilization built-in my arms and hands :) ?

Also make sure to give my free eBook a try. You will find more than 20 pages full of photos in it.

EXIF data:
Camera: Canon 5D MK II
Lens: Canon 24-105 f/4 L IS USM
Focal length: 75 mm
Aperture: f/8.0
Exposure time: unknown (got deleted - sorry :) )
ISO: 640
Number of exposures: 3
E.V. Step: 2 E.V.
Flash used: no
Tripod used: no
Filters used: no
Software: Photomatix Pro 4.2.5, Magic Lantern, Lightroom 4.1, Photoshop CS5

Continue reading for more details »

a21 December 2012

Drawing from Warsaw

When I uploaded this image for the first time on my Facebook account I didn't expect many likes nor comments because I did it mostly for fun. However, in a very short time it became one of my most popular uploads. For that reason I would like to share it with you today.

To create it I used one of my recent photos from Warsaw. What I did was quite simple but I won't share all details now as I would like to write a tutorial about it if there is enough interest. Generally speaking I blended together a sketch and a photo of the same place (sketch was created digitally as I'm not skilful with drawing...).

Also make sure to give my free eBook a try. You will find more than 20 pages full of photos in it.

Continue reading for more details »

a20 December 2012

My first free photo eBook


Inspired by +Jim Nix and +Dawid Martynowski I decided to give it a try and to create my own first photo eBook. It contains the best photos I took this year. Hope you like it! I'd be grateful for any shares and comments.

You can view it here or download here.

Continue reading for more details »

a19 December 2012

Buying books

Buying books by Wojciech Toman
Click on the photo to view it in large size on black background.
This might be one of the best of my photos ever taken. It's just one of the few (2 or 3?) that I'm really happy about and really satisfied with the result. I wouldn't change much in it. Colors, light, mood, composition - everything is quite nice.

Here is the story behind the picture: I saw this man in front of that very book store and thought it would make a great photo. I set up my tripod quickly and just hoped he won't go away nor won't he give me strange looks thus ruining the composition :) He didn't. When I was taking my 7 brackets (about 1.30+ minutes in total) he was just moving slightly, looking at the books at different angles. Was he choosing a gift? Maybe.

Some of you complained that this photo is unrealistic. Yes, it is. I didn't want to be ultra-realistic because such post-processing doesn't suit this scene very well. I wanted it to be sort of painterly, to resemble an illustration or cover of a book for children.

Technical details:
Camera: Canon 5D MK II
Lens: Canon 24-105 f/4 L IS USM
Focal length: 24 mm
Aperture: f/11.0
Exposure time: 4 s ("middle" exposure)
ISO: 400
Number of exposures: 7
E.V. Step: 1 E.V.
Flash used: no
Tripod used: yes
Filters used: no
Software: Photomatix Pro 4.2.5, Magic Lantern, Lightroom 4.1, Photoshop CS5

Continue reading for more details »

a18 December 2012

Christmas Market in B&W and new wallpaper

Just a few days ago I uploaded a photo of the Christmas market in Warsaw. You can view it here. Today I would like to share black & white version of this photo. I really like it because it makes you focus more on details and light.

What's more I finally added new wallpaper to the Wallpapers section:
Hope you like it!

Continue reading for more details »

a17 December 2012

Rush hours

Today I would like to share with you a photo showing light trails during rush hours in Warsaw.

EXIF data:
Camera: Canon 5D MK II
Lens: Canon 24-105 f/4 L IS USM
Focal length: 24 mm
Aperture: f/22.0
Exposure time: 45 s
ISO: 100
Number of exposures: 1
E.V. Step: n/a
Flash used: no
Tripod used: yes
Filters used: no
Software: Magic Lantern, Lightroom 4.1, Photoshop CS5

Continue reading for more details »

a16 December 2012

Thoughts: I'm against watermarking photos

Yes, my photo was stolen. I know of at least one incident like that, maybe it happened a few more times (it's hard to tell really unless someone informs you of such a case). It's sad and makes me angry because someone else gets attention because of my own work. Of course my work is on Creative Commons licence (Creative Commons Attribution-NonCommercial-NoDerivs 3.0 Unported) but it doesn't mean it's free nor that one can put his name under any of the images.

One of the commonly used ways to protect your photos against stealing is putting a watermark on them. However, I'm not really happy about doing so for several reasons:
  1. If you put watermark near the border then stealing an image is still a very easy thing as it is just enough to crop the watermark out. And so many photographers put it right there.
  2. If you put a watermark in the area with many details or in a place that is important to the image perception you actually make the image weaker. What you can do instead is to put a watermark in a non-important part of the image (eg. over the sky or road) but in such a case it might turn out that it is still very easy to remove it by cloning or using a content-aware feature in Photoshop.
  3. It is distracting. If I make a photo I often want viewers to focus on a certain part of the image or lead their eyes into something in the picture. By putting a watermark I can ruin that because there is a great chance that they will first look at the watermark and only after that at the picture itself.
  4. One of the options is to make sure watermark fits well into the image (in a sense that it becomes part of it) but to be honest I haven't seen it executed well up to now.
For the reasons mentioned above I won't use traditional watermarks in my images. The only watermarking I can consider is digital watermarking which is a combination of bits put into the image file and which doesn't change the look of the image. Another thing I started to do recently is to upload a smaller version of the photos.

Continue reading for more details »

a15 December 2012

Christmas market in Warsaw

Christmas Market in Warsaw
Click on the photo to view it in large size on black background.
I love this very feeling when I take a shot and I know how it'll look after merging, tone-mapping and post-processing. I knew it will be nice when I came up with an idea of taking it and I was sure about than when I was setting my tripod and framing my shot. I just knew it. I was still very surprised by some very positive comments because some of you think this photo is great in fact.

EXIF data:
Camera: Canon 5D MK II
Lens: Canon 24-105 f/4 L IS USM
Focal length: 24 mm
Aperture: f/16.0
Exposure time: 1.6 s ("middle" exposure)
ISO: 400
Number of exposures: 7
E.V. Step: 1 E.V.
Flash used: no
Tripod used: yes
Filters used: no
Software: Magic Lantern, Photomatix Pro 4.2.4, Lightroom 4.1, Photoshop CS5

Continue reading for more details »

a14 December 2012

Blue Hour in the Old Town

After yesterday photo got some nice feedback (mainly on Facebook though), it's time for another one taken during that shoot. I took it just before blue hour... well there wasn't golden nor blue hour really as there were boring clouds all over the sky...  still I managed to get some of this blueish light into the shot and I really like how nice the lights of the Old Town look against it.

As for the composition - it was the best I could get with the lens I had with me (Canon 24-105). I would love to separate the Xmas tree and the tower of Royal Palace a little bit but it would result in a column appearing in the frame - and I didn't want that... ok, excuses excuses but I still hope you like the shot :)

EXIF data:
Camera: Canon 5D MK II
Lens: Canon 24-105 f/4 L IS USM
Focal length: 24 mm
Aperture: f/8.0
Exposure time: 1.0 s ("middle" exposure)
ISO: 100
Number of exposures: 7
E.V. Step: 1 E.V.
Flash used: no
Tripod used: yes
Filters used: no
Software: Magic Lantern, Photomatix Pro 4.2.4, Lightroom 4.1, Photoshop CS5

Continue reading for more details »

a13 December 2012

Christmas atmosphere in the Old Town

The Old Town (and its surroundings) of Warsaw looks really beautiful right now! So many colours, nice decorations are all over the place. And there is some nice market on the Old Town square (I'll post some photos of it soon). Also the pavements are wet so they reflect all those lights, colurful buildings and Xmas trees. It makes your eyes really really busy - you don't know what to focus on. I was like a kid running from a place to a place with my tripod and 5D mounted on it (and even no one complained about that... and believe me - it was very very crowded). Several shots here, several shots there. I didn't want to miss a single piece of this fantastic atmosphere. I uploaded several photos to my Facebook profile already and got some very positive feedback. Here is one more photo.

Despite taking some really nice to amazing shots I still feel hunger for more and I will definitely visit the place a few more times in the next few weeks.

From technical point of view taking shots there right now is pretty challenging because there are so many people so you have to be really patient. However, due to long exposure + deghosting in Photomatix I was able to "erase" most of them.

EXIF data:
Camera: Canon 5D MK II
Lens: Canon 24-105 f/4 L IS USM
Focal length: 24 mm
Aperture: f/9.0
Exposure time: 1.0 s ("middle" exposure)
ISO: 200
Number of exposures: 7
E.V. Step: 1 E.V.
Flash used: no
Tripod used: yes
Filters used: no
Software: Magic Lantern, Photomatix Pro 4.2.4, Lightroom 4.1, Photoshop CS5

Continue reading for more details »

a12 December 2012

My favourite lens is...

I took this HDR photo of a dead tree in Masuria from 5 exposures at 2 EV spacing.
And the answer is: Canon 24-105 f/4 L IS USM. I used it for as many as 21% of my already developed photos since I started photographing with digital cameras back in 2008.

I already mentioned it a few times but I will repeat it once more: it's a really great lens and very universal one too. At the time I was buying it I was also considering Canon 24-70 f/2.8 but longer focal range turned out to be really helpful in a number of situations. If I go shooting with only one body with a single lens most of the time this is the lens I take with me. It allows me to take both wide-angle landscape shots and some nice close-ups as well (70 mm sometimes wouldn't suffice). What's more if you use a crop camera like for instance 7D, the focal range becomes 38-168 so you can have an "entry level" tele-zoom lens if you cannot afford 70-200, 70-300 or similar.

The lens is quite compact and its weight isn't too heavy. It suits 5D MK II perfectly (it was/is its "kit" lens) but I had no troubles using it with other cameras like 50D and 400D as well.

Canon 24-105 isn't ideal though. Two biggest issues for me are chromatic aberration and flares. Both are much worse than in Canon 24 f/1.4 L II USM but given that the latter is a one fantastic prime - it is to be expected. But you know when you get used to images which contains very little of them produced by Canon 24 mm prime it's really difficult to stop comparing the results.

Sharpness is good - it's all that I can say :) Above photo was taken with this lens and it should appear pretty sharp (at least it does on my monitor at the time of writing). I've definitely seen sharper lenses (especially Canon 100 L Macro and Canon 70-300 L lenses) but sharpness is good and with a little of sharpening in post the images can be made very sharp.

Lens could be a little faster but as I use it mainly for travel photography it's sufficient most of the time - especially as from my tests this lens is sharpest between f/7.1 and f/8.0 and these and slower apertures are the ones I use most of the time with any lens.

So summing up this very short post - it's a great universal lens that all travel photographers should have with them. If you want to travel light it is perfect choice.

Continue reading for more details »

a11 December 2012

Thoughts: Being an amateur means... worse?

I took this long exposure photo during sunrise on Fuerteventura island.
Yes, I'm an amateur photographer and I'm happy about that. For many people being a good photographer requires being a professional. You need to behave like a pro (and talk all that buzzwords some of which I don't really understand), have the best pro equipment and so on. It makes you better in their eyes. Ok, I do use nice equipment but I'm not buying a new camera because of it's pro features. I buy one when I feel that current model used by me stops me from taking certain shots.

All this is because amateur for many means lacking skills or knowledge. But in fact it doesn't need to be that way. Professional might also mean photographer who actually works as a photographer.

For me photography is a hobby, passion maybe. I really like capturing moments and presenting them to the wider audience over the web (or in any other form). Do I have skills? Well, I don't think I'm the right person to answer this question, I'll let you judge. But I definitely do have some knowledge and especially the need to improve my works. Every time I take a photo I learn something new. I make mistakes but next time I will be stronger because I will know how to avoid them.

For me photography is also a way to express myself. It means much to me as I can show others the way I see the world, how I perceive different things, phenomena etc. Being a technical person most of the time (I'm computer programmer for more than 15 years now... despite being 25 :) ) I really feel the need to show the others different part of my nature. Programmers are often considered geeks but I try to prove this wrong: one way of doing so is photography. You can be technical and artistic person at the same time. Nothing strange or wrong with that.

Moreover, I don't want photography to became my profession because I'm pretty sure I would soon become tired with it and therefore loose passion and drive to find something new in it. It was the same thing with video game development for me. I was really passionate about it up to the moment when I started creating video games for a living. And I soon became tired and fed up with them. One more thing about work (profession) is that if you spend several hours a day on your assignments you won't have much free time for your personal projects. And in photography I don't want to have no time for my own ideas. I love shooting photos in my own way, choosing my subjects and destinations on my own. I love full control over what I do and how I do it. Even if you own a company you don't have such control because it is the market and customer's needs that control it then.

Finally for me being amateur doesn't mean being worse than professional (but it doesn't mean better either). In fact one of the definitions of the amateur word is following:

Amateur - a person who is fond of or admires something

Yes, I am fond of photography and yes I do admire it. Given that definition, professional photographer can be amateur at the same time. In fact he should be to create stunning works. Otherwise being a professional would just mean working as a photographer what isn't the same as great photographer.

Continue reading for more details »

a10 December 2012

Triumphal Arch in Rome

I took this image from Colosseum in February 2011. I really like the amount of detail in it.

Continue reading for more details »

a9 December 2012

Some changes and focused on the toy

Today I upload a photo of my Maine Coon cat looking at her favourite toy. I love how focused her eyes seem to be on the target.

I also made a few minor changes to this blog. First of all you can now Pin my photos to the Pinterest. Just click Pin it button under any post to do this. I would be more than grateful for that. I also changed layout and look of the blog a little bit with plans to enhance it further (or to change completely, I'm not yet sure).

EXIF data:
Camera: Canon 5D MK II
Lens: Canon 100 f/2.8 L IS USM Macro
Focal length: 100 mm
Aperture: f/2.8
Exposure time: 1/400 s
ISO: 3200
Number of exposures: 1
E.V. Step: n/a
Flash used: no
Tripod used: no
Filters used: no
Software: Lightroom 4.1, Photoshop CS5

Continue reading for more details »

a8 December 2012

Having photography blog makes no sense

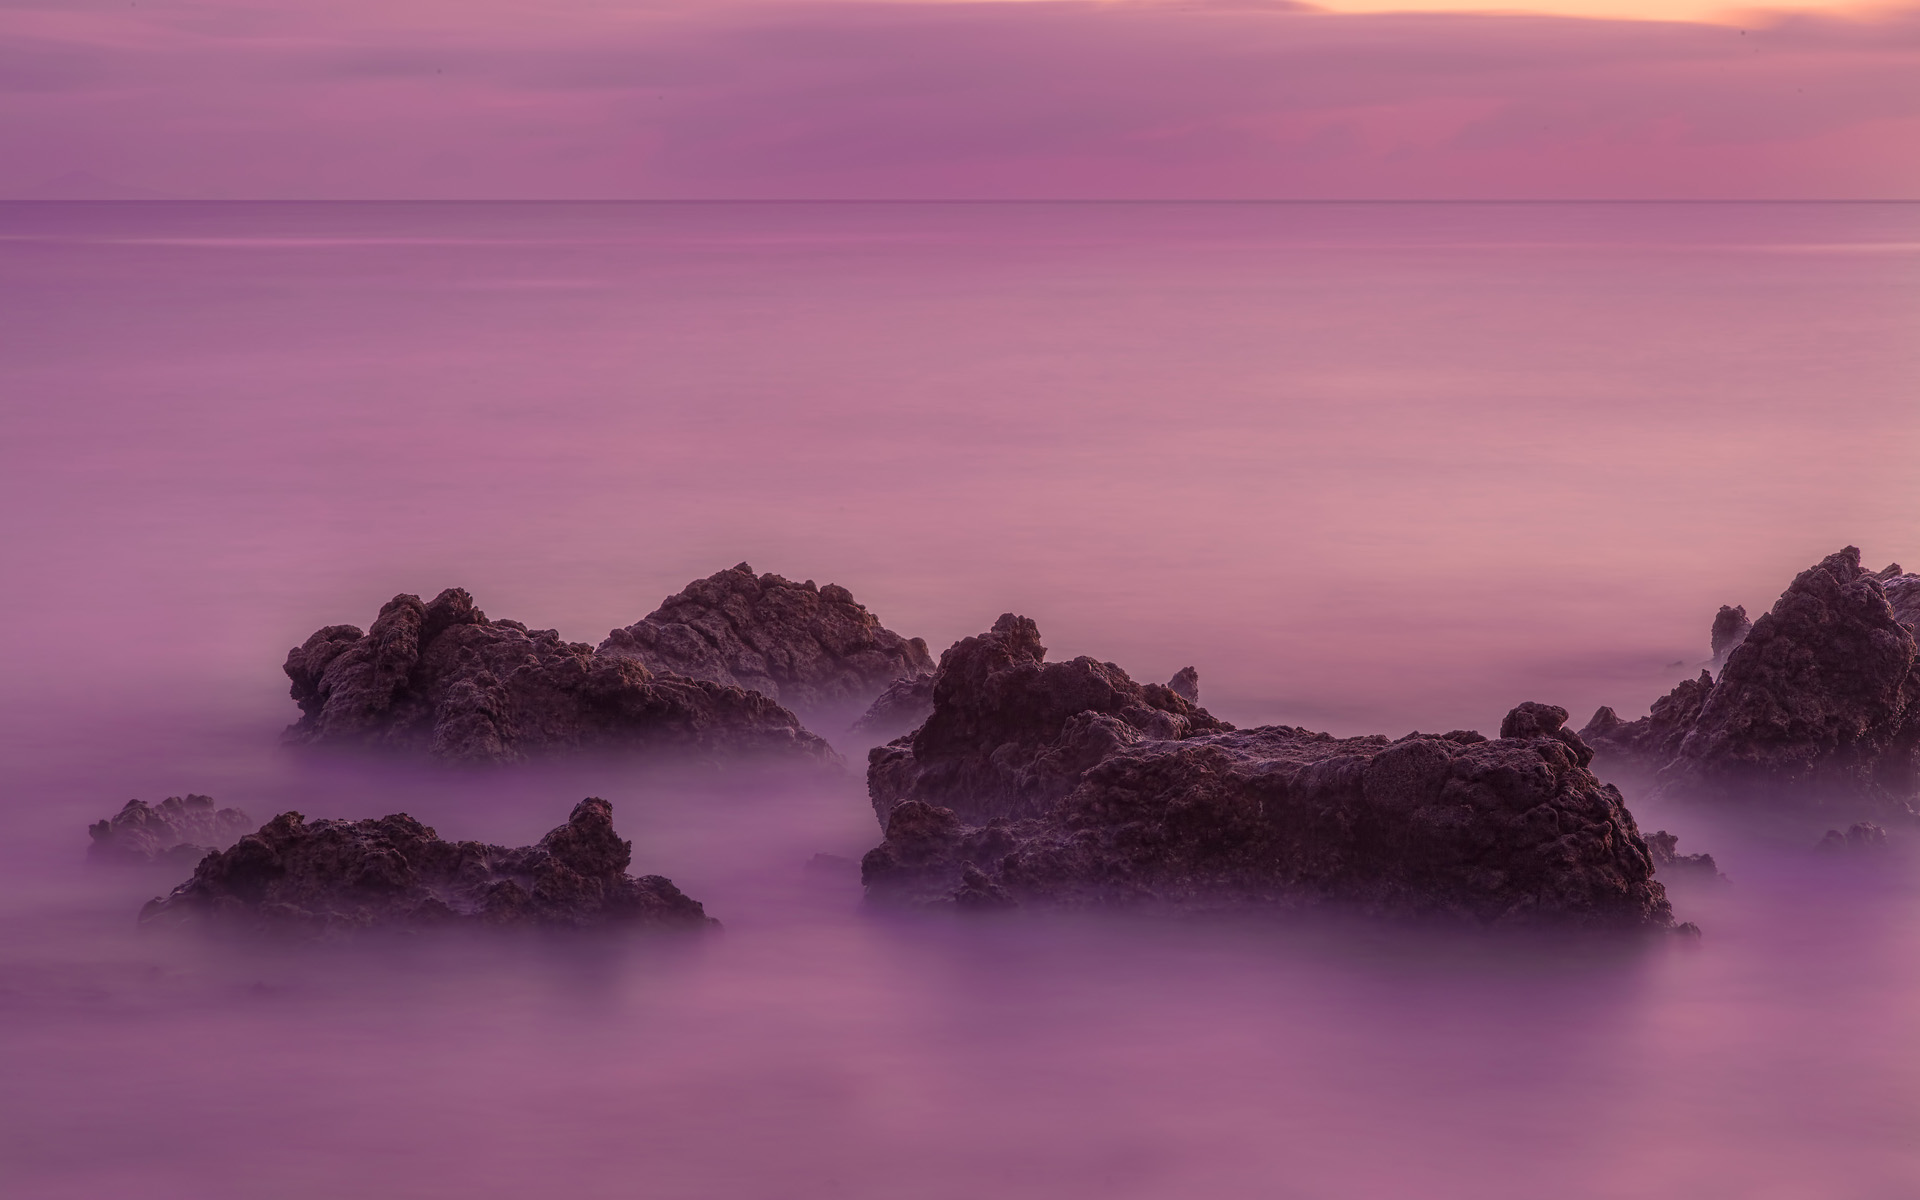
I took this photo during sunrise. There was storm over the island in the back (Lanzarote) and it was initially heading in my direction but then the wind direction changed so I could stay and continue taking photos.
Is there any sense of having a photography related blog? Well, I'm sometimes not sure about this.

For me and probably for many other photographers writing a blog is one of the most important aspects of their existence in the Internet. Ok, I have Facebook account, as well as Google+, Flickr, 500px, Twitter, Pinterest and probably even more I don't remember now... but it is my blog that is the most important for me. I use the services mentioned mainly to share my new photos or blog posts :) and view photos of other photographers. Sometimes (rather rarely) I also put a short update on some progress with photo processing or something like that. But it is the blog where I share my ideas about photography and knowledge because I think it is the best for this purpose. I can write as long posts as I want and they won't get trimmed as they do on Facebook, I can put as many photos as I want in a single update and so on. I can even influence formatting and style of my posts to make them look the way I want. I have much greater control over my contents than anywhere else.

The main "problem" I think is that taking a look at a picture on FB/500px/Google+ and clicking like/vote/+1 takes seconds literally (I think that there are even people who don't look at a photo but do it semi-automatically in hope you will also click +1 on their own photos). Writing a comment like "Great capture" also takes just a few seconds. And then you can switch to another photo, like it and put the same "Great capture" comment, switch to another photo and so on. With blog or website it's not that easy. You have to enter it for particular reason - you might be interested in a subject of a post, there might be some interesting tutorial, you could find it on Google while looking for something and so on. However, it's much more difficult to get as wide audience as on social services for that very reason - you have to leave Facebook/Google+ and enter another site. If the post is long and not interesting for you, you will leave immediately without reading it and you won't also take a look at other posts by the author.

Another thing is that there are plenty (probably tens of thousands or hundreds of thousands) of great photography blogs out there. And from this large masses only a few will succeed. It's all about topics they cover, quality of their photos and also a bit of luck. Without luck even the greatest blog can in theory go unnoticed. This might silly but sometimes I'm shocked seeing great photographers on Flickr or 500px having just a few comments under their photos. And some of them take absolutely amazing images. So yes, luck is also a player here :)

So if we consider the audience blogs are often worse than any other platform. But there is other aspect I already mentioned. You can share your thoughts in a way you control. It's the reason I have a blog. I love sharing my knowledge. I learned this as a game programmer in the past where almost no one makes secrets about technology they use. Take the best game visually and you will find plenty of articles, presentations and blog posts about technology they used when producing it - most of them completely for free. Why? I believe the reason for this is that game programming as an industry evolves all the time and to make the progress faster it is essential we share knowledge so someone else can build on that and improve our own technology. There are plenty of photographers who think the same, I'm amongst them for sure. All I know I learned from someone else or by trial and error. Just a digression :)

So summing up, I'm generally not disappointed with my blog as I see all the major statistics increasing week by week and month by month (and it's such a motivating thing!). However, I know that to get more visitors on a blog it costs me much more effort and time than on Facebook and it's somewhat irritating if I may put it this way :) I wish it was the opposite because I'm really not a big fan of social services but I'm a fan of good blogs :)

Continue reading for more details »

a7 December 2012

Summer, summer, summer

Winding road
Click on the photo to view it in large size on black background.
I wish it was summer again. It's cold, snowy/rainy... brrr. So I upload a photo I took last year. I hope warm light in this image will make you feel better.

EXIF data:
Camera: Canon 50D
Lens: Canon 24-105 f/4 L IS USM
Focal length: 67 mm
Aperture: f/18
Exposure time: 1/10 s ("middle" exposure)
ISO: 100
Number of exposures: 5
E.V. Step: n/a
Flash used: no
Tripod used: yes
Filters used: no
Software: Photomatix Pro 4.1, Lightroom 4.1, Photoshop CS5

Continue reading for more details »

a6 December 2012

Tutorial: dealing with waves and long exposures in HDR

In this photo I used techniques described in this tutorial.
If you ever photographed seascapes in HDR (especially with long exposure, for instance during sunrise or sunset) you know there is one big problem problem. Waves are a really difficult subject for HDR. Why? Because in each frame they differ significantly. This becomes even a bigger problem when photographing sunsets or sunrises because in such case you deal with long exposures (what generally speaking makes ghosting artifacts more difficult to remove). Removing ghosting in clouds is fairly easy but the water is more tricky.

Take a look at 3 out 5 photos from the following sequence of bracketed photos I took during sunrise on Fuerteventura:


Water looks completely different in each of them! Details and smaller waves start to disappear with exposures becoming longer. I like the look of water in the last image most so I would like it to be used in the final image. However, if you decide to use deghosting you will most likely end up with something different as deghosting algorithm in HDR software might decide that it is better to use something different or to combine parts from different shots. And they might be right for technical reasons but not aesthetic ones.

There are two ways to deal with it, both can work as good (and I will show both of them):
  1. Use selection replacement tool in Photomatix Pro to replace water with any of the source photos,
  2. Mask regions of water in Photoshop CS using source images.
My advice when dealing with such scenarios is to make sure deghosting is disabled in preprocessing options and that cropping aligned image is also disabled. Why I recommend to disable deghosting? The reason for this is that as it is automatic (or semi-automatic) process you won't have full control over the look of water and often the result won't be what you want it to be (software don't know your reasons and what you want to achieve). If all the frames contained similarly looking water it would be a good idea but in this case it is not.

Continue reading for more details »

a5 December 2012

My first ever timelapse movie


My first ever timelapse movie. Ok, the first one I decided to upload. It's more a test than finished work but I still decided to share it. As for technical details - I used Magic Lantern 2.3's intervalometer with bulb-ramping turned on. After taking all the pictures I created a timelapse video inside Photoshop CS6.

I hope to deliver something better soon (as I have a few more timelapses waiting to be processed).

My opinion on timelapse? Well, it's quite an interesting technique, however, I don't think I will shoot it often. As I'm shooting a lot of HDR photos, shuttercount is already something I see increasing way too quickly. With timelapse it would increase much much faster...

Continue reading for more details »

a4 December 2012

The Colosseum


Today I decided to upload a bit older image, taken in Rome in February 2011. I wanted to capture this amazing building from a bit different perspective and I think I managed to.

Continue reading for more details »

a3 December 2012

Tutorial: useful Photoshop shortcuts

Photoshop keyboard shortcuts
HDR photo taken at the beginning of sunset on Fuerteventura island.
More a tip than a tutorial today. I believe that using keyboard shortcuts are one of the best ways to improve efficiency when working with any computer application. I use them in every software, whether it is a programming IDE or an imaging application. Today I would like to share with you a set of my favourite and most often used Photoshop CS shortcuts.

Print them and put next to monitor to remember them more quickly :)

Layers and image:
  • CTRL + N - create new image
  • CTRL + SHIFT + N - create new layer
  • CTRL + I - colour inversion - it is especially useful when working with layer masks as black becomes white and white becomes black
  • CTRL + J - duplicate selected layer
  • \ - [when modifying layer mask] - red overlay is displayed over the image representing the layer mask. It makes masking much much easier
  • ALT + left mouse click on layer mask - displays only layer mask
  • ALT + left mouse click on the layer visibility icon (small eye) - all other layers are hidden but the clicked one
  • SHIFT + left mouse click on layer mask - disables layer mask (useful to compare before and after applying the layer mask)
  • SHIFT + CTRL + E - merge visible layers (removes all layers)
  • SHIFT + CTRL + ALT + E - merge visible layers and create new layer with the result in it (doesn't remove any layers)
Selections:
  • CTRL + A - select whole image
  • CTRL + D - select none (deselect)
  • SHIFT + CTRL + I - select inverse 
History:
  • CTRL + Z - undo/redo last action
  • CTRL + ALT + Z - undo action from the history (one by one)
  • CTRL + SHIFT + Z - redo action from the history (one by one)
  • CTRL + F - repeat last filter (with the same settings as last time)
Tools:
  • B - select a brush tool
  • C -  select a crop tool
  • D - [when using a brush] restores default background and foreground colours (black & white)
  • X - [when using a brush] when using a brush it toggles background with foreground colour
  • ] - [when using a brush] increases size of a brush
  • [ - [when using a brush] decreases size of a brush
  • SHIFT + ] - [when using a brush] increases hardness of brush
  • SHIFT + { - [when using a brush] decreases hardness of brush
Other:
  • CTRL + SHIFT + ; - toggle snapping on and off
  • F8 - toggle Info panel visibility 
  • CTRL + W - close selected file
  • CTRL + ALT + W - close all opened files. Very useful if you have a lot of files opened and you need to close them all.

Continue reading for more details »

a2 December 2012

Doing tricks

Another action shot today. This guy was doing some very nice tricks so I captured a few photos of him.

For the next week I have at least one tutorial planned (and there is a chance for 2!) so stay tuned. I also have plan for some nice shots and hope you will enjoy them as well.

EXIF data:
Camera: Canon 50D
Lens: Canon 70-300 f/4-5.6 L IS USM
Focal length: 300 mm
Aperture: f/6.3
Exposure time: 1/800 s
ISO: 200
Number of exposures: 1
E.V. Step: n/a
Flash used: no
Tripod used: no
Filters used: no
Software: Lightroom 4.1, Photoshop CS5

Continue reading for more details »

a1 December 2012

Realistic presets for Photomatix Pro


It's been a while since I shared some presets for the last time so today I decided to share two Photomatix Pro presets I use almost exclusively recently and I call them realistic presets. I used them for instance when processing image above which shows one of the churches in La Oliva on Fuerteventura island. Note that these presets require further processing (either using Finishing Touch in Photomatix Pro or in Lightroom/Photoshop) as they purpose is mainly to preserve as much detail as possible. They don't care about colour that much.

Here they are:
To save them just right-click either of them and select "Save target as" (or equivalent).

It's not the first time I share my Photomatix Pro presets. For much more you can view this, this and this post.

To install the presets*:
  1. Download the presets and extract them on your disk.
  2. Start Photomatix Pro 4.2. If you haven't updated to 4.2 visit HDRsoft homepage and download your upgrade (in case you're eligible to it).
  3. Open any image and tonemap it to go to the tonemapping preview mode.
  4. In the Presets window change tab from "Built-In" to "My Presets".
  5. In the combo-box in the upper part of the Presets window select "Import Presets..." item.
  6. Navigate to the directory where you extracted presets and select all the files you want to import. You might also want to specify category for the imported presets (eg. "Downloaded"). To do this just fill in the text field at the bottom of the Import window.
  7. Accept the selection and wait for the thumbnails to appear. Voila!
 Hope you like it!
 * In case of older versions than 4.2 you can follow instructions I posted here.

Continue reading for more details »